The Bilge Pump Never Came On
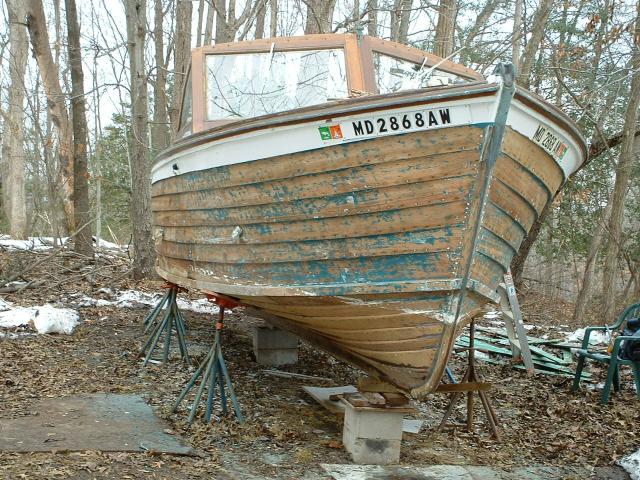
That’s right. The summer of 2010 the bilge pump never came on because of hull leaks. This is the tale of the rebuild of Euphemia, a 1966 26’ Mackenzie.
I thought about a “newer” boat for upwards of a year or two. It had to have all the attributes of a Mackenzie that pushed my buttons. The sheer, the soft way it ran out to the stern, that soft, solid ride . You know those feelings that you can’t describe to someone who doesn’t “see” things the way you do. I must admit however that I was enamored by the Holland 32.
Then I tried to comprehend the economics. Used Hollands were asking anywhere from $60K and up. “Euphemia” needed to have almost all her original bottom replaced. I’d seen a few places where my pocket knife went right through the planks. Places like that I had sistered over. Some planks had bad grain that had begun to split. With all the building up of bottom paint and Slickseam caulking, it was hard to see the smaller weak spots. I think the straw that broke this camel’s back was when the pressure washer punched right through one layer of a lap joint after haulout the fall of ’08.
A few years earlier I had run into Mark Schofield at the Maine Boat Builders Show and just casually inquired what a new bottom might cost. He threw out a number of about $20K. Well now I’m beginning to think about $20K versus $60K and getting to keep a boat I really love. After updating our estimates and after Mark came to visit and look Euphemia over, he said he could take it on in the coming fall, that meant late 2009. The big hitch would be finding a supply of high quality South American pattern-grade mahogany. It had been in very short supply for quite a few years. So I told him if you can find it, let’s go. Two days later he called. Downes & Reeder was trying to reduce inventory and had made us an offer we weren’t going to refuse. That week we bought 400 bf of the most awesome boat-hull mahogany I’ve ever seen. Long, wide, clear and straight. Mark had hand picked the best pieces. As many of you may know, Mark has had a hand in rebuilding, to different degrees, somewhere close to a half dozen or more MacKenzies.
We delivered Effie by truck in the second week of September 2009. I had already stripped out the cabin and removed the engine. My plan was to work along side Mark as his gopher Monday, Tuesday and Thursday and Friday. By the time I arrived on the first Monday, I had that scared empty feeling when looking in the shop door and seeing where he had taken a sawsall and simply cut out large sections of the forward hull and then BURNED THEM. Oh clear sacrilege – I never throw anything away.
As we started taking off the old planks, we immediately saw that the bottom frames were shot and the old fasteners were worse. Delano Sawmill in North Dartmouth helped me come up with enough beautiful air dried vertical grain white oak for all the frames and new floor timbers. The floor timbers were originally fastened to the keel plank with carriage bolts of silicone bronze (Everdur) from the bottom up. That is to say, counterbored into the bottom surface of the keel plank, through the keelson and floor and secured with nut and washer. With the skeg below the carriage bolt heads the old bolts couldn’t be removed.
The solution was to chisel away the old floor, saw off the then exposed end of the bolt flush with the keelson. Then with a specially adapted hole-saw, with no center drill, saw down toward the head of the old carriage bolt. With the old carriage bolt removed, clean out and chase the resulting hole and plug it with a larch bung bedded in Sikaflex 291. When this had set up we placed the new predrilled and fitted floor timber of 1-3/4” wide vertical grain white oak over the spot on the keelson and drilled a ½” hole to the top of the skeg followed by a 7/16” hole into the skeg 2”-3”.
When this was done we made up 12”L x½”dia. pieces of silicone bronze rods with 2+” of thread at one end and 1” of thread at the upper end. These we then threaded through the floor, keelson, keel and skeg, and into the skeg until they drew up hard. The end result is that instead of a skeg being attached to the hull as originally, every 24” – 30”, it is also attached at every frame except in the way of the shaft.
All of the bottom frames and upper frames which had to have new lower ends sistered on, were bedded together with 3M/5200 fast cure and 3/8” stainless steel hex head bolts. All wood, new and old, is painted with redlead before assembly and again afterwards.
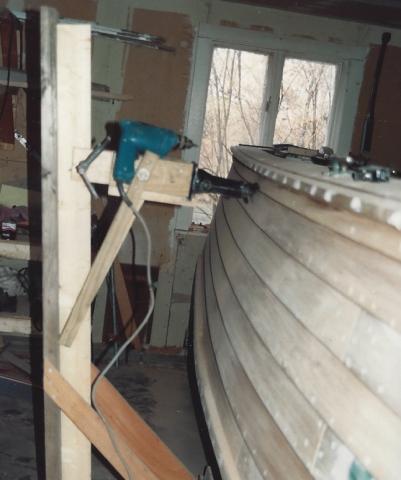
When she was reframed we were then ready to start with the original project of replanking. Mark said this was the fun part and it was. She began to look like a boat again and if you were ever to have been in doubt as to Mark’s experience (and I can’t imagine how) you are about to become a true believer. The planks just flew on: planing, spilling, rough trim, fair top edge, letting in gain and beveling, steaming, fitting in, setting bottom edge, bedding at all fayed surfaces w/5200, clamping, screwing at frames, plus drilling for machine screws every four inches on the lap. Completing two planks a day. Thirty planks total. Then there was the special task of a new lower 9” of transom and reinforcement to the stem.
We located, through a source of Mark’s a 28’ piece of angelique from Suriname for the chines. (I have a 3” x 4.5” 28’ length for sale.) Steve St. Angelo supplied us with some 7/4 mahogany for the splash rails outside the chines. The whole process went very well and we almost never disagreed, but when we did, Mark won. Mark really knows his stuff. He is a man who has the unusual ability to “see” how a physical item (boat) will act in its natural environment (water) without it ever having to be so. The proof is in the trial. He is innately able to carry out the why and way of putting something together while anticipating the potential future what ifs. If anyone is ever contemplating saving a beautiful old wooden craft, they need to talk to Mark.
You also need to keep in mind that if you’re planning on working with him, and you are thirty years older than he is – think again.
Peter Katzenbach
To view a photo album of the restoration of ENCORE click the link below.
To view a photo album of the restoration of LET'S GO click the link below.
To view a photo album of the restoration of LITTLE DARLIN click the link below.
To view a photo album of the restoration of STREGA click the link below.
To view a photo album of the restoration of EUPHEMIA click the link below.
The Story of
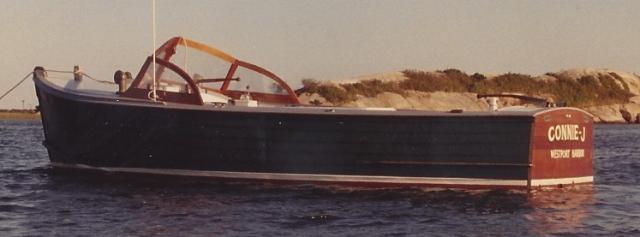
“Connie J”
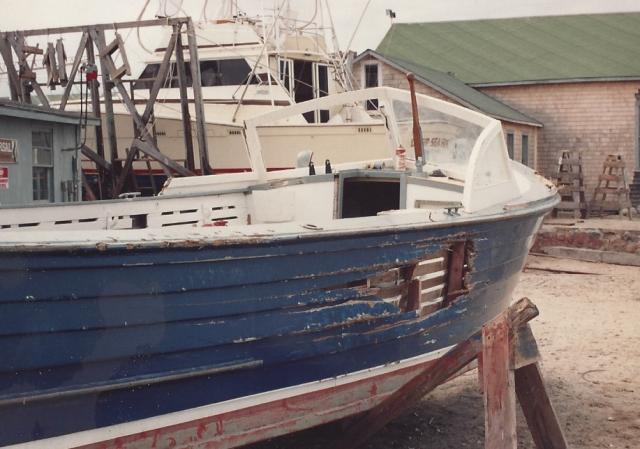
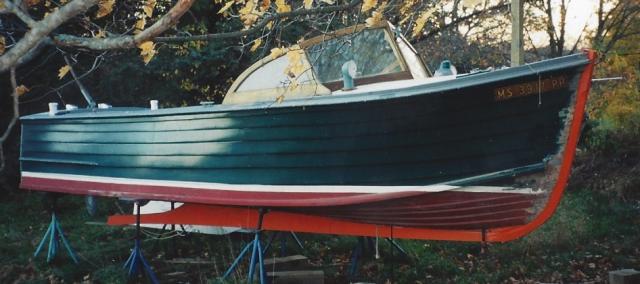
By 1951, Ernest J. MacKenzie had moved his operation to a yard on the Jones River in Kingston, Ma where he shifted his production of the Cuttyhunk Bass boat bearing his name into high gear. One of the products of that year was the 23 bearing the name of “Connie J” today. You can tell the vintage by the tumblehome in the transom, whereas the later Macs all have the distinctive flare.
I married into a wooden boat family. My brother-in-law builds wooden boats for a living and my wife’s first cousin can be found in “Wooden Boat Magazine” in numerous articles on practical matters like making your own plane. In 1977, I completed my formal medical training in California and moved back to Massachusetts with my wife to raise our family. There appeared a classified add in the local newspaper that month for a fishing boat owned by a Blackie Joaquim in Somerset, husband of Connie….Blackie had a “heart condition”, and his doctors had advised that he quit the striper business. Connie J came into my family as a result and has been under my care ever since.
Her hull was partially covered with fiberglass and in terrible shape. The stem and keel were poorly patched, but functional. The engine was the original Crusader 150, but it worked. Knowing almost nothing about wooden boat restoration, I slapped on some bottom paint and in she went. She leaked like a sieve but there was a bilge pump, and a powerful urge to go fishing.
At some point, later that year, I found her awash up to the windshield at her slip, having exhausted the battery from constant operation of the bilge pump. So, the first lesson was that you should think twice about owning an old wooden boat, which you intend to see only on the weekends.
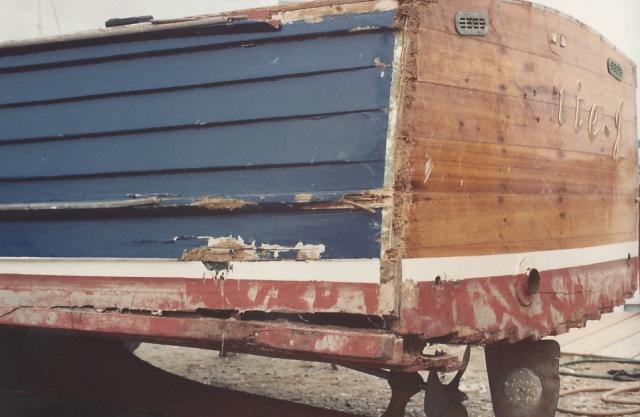
Risen from her would be watery grave by the local yard, the engine was revived, electrical system replaced and I set to work learning about wooden boat restoration. The real problem turned out to be the juncture of the hard chine and transom, where two diagonal steel bolts pass through a 2 inch oak corner block secured the transom frame to the chine timber itself in each aft corner, or were supposed to. After a while steel rusts and even white oak doesn’t like that: lesson #2. So, the chine needed replacing, as did those corner blocks. Well, retrofitting a chine is a daunting way to cut one’s teeth, but, by sneaking off the chine plank, paying close attention to the materials and construction methods originally used it happened, and, with the additional replacement of one of two rotten bottom planks, using the same approach, we were back on the water the next year.
For years, after that, with regular caulking and painting, she remained remarkably tight and seaworthy. Then, in October of 1987, during a rogue Nor’easter, a one ton day sailor, marched its mooring across the harbor floor and came to rest on top of the Connie J. Gone was the windshield. Both bottom and topsides were sprung and badly holed, the transom mortally wounded, For all intents and purposes, she was finished, and I think, as I was at home two hours away, if the yard hadn’t raised her again, strung her together with plywood and put her on her trailer, I would have given her up for dead. But they did and I didn’t.
A long, slow and , I admit, embarrassing ( due to her appearance) trip back to Northampton, MA was followed by a two year reconstruction. In the beginning, during my solo efforts to jack her up off the trailer and down on rollers, the jack failed. Down she came, coming to rest, chine on my pelvis. A friend happened by at that moment, and, putting to use the large car jack I had kept in reserve, got me out. Lesson #3: Never attempt to jack up a boat from underneath, let alone, by yourself.
Several weeks later, my broken back largely healed, the project, now much greater than before, resumed. New oak frames, new mahogany bottom and topsides, new transom and windshield. Each member reassembled, what was left of it, traced on new stock and cut to match. Bronze screws to frames were simple. Backing copper rivets by yourself without another pair of hands outside isn’t. But innovation triumphed this time, and a contraption secured to the keel below with a screw type car jack horizontally mounted above and joined to a countersink punch was constructed and served well for the missing .outside pair of hands. Two years later, back on the trailer. thanks to a local crane operator friend, (most mistakes I’ve managed to only make once), we were back on the Mass Pike headed east. A brand new Marine Power 6 cylinder gas engine and electrical system, and into the water for another life.
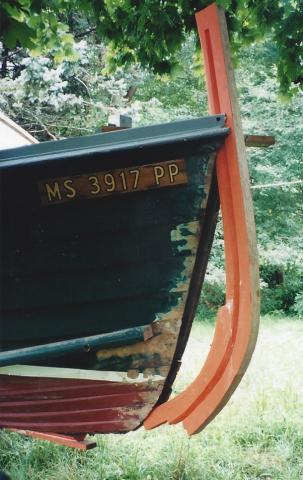
There remained one more long overdue project: the aging stem and keel. Finding the right piece of aged white oak from which to cut the members took a couple of years, in fact, as my commitment to adhering to original construction methods had dictated against a laminate stem. But once found, the next problem was the removal of the old stem and keel without losing the boats shape. However, as lap strake construction would have it, the hull planking was rigid enough to retain its shape without the stem. The rabbit was spiled off the old stem and the ends of the planks forward were repaired. Once done, the new stem was nestled into place and the fastening completed without incident. With new mahogany garboards, white oak keel and fresh bronze keel bolts in place, she was back in the water without missing a single season.
For a wooden boat hobbyist, the restoration of a MacKenzie of this size, can, in fact, be accomplished, I’ve learned over the last 37 years, in a staged fashion, allowing the owner a minimum of lost fishing time. Moreover, the various aspects of the endeavor can also be carried out alone if one is short handed, with a bit of innovation and patience. But as renovation of the hobbyist’s frame is more difficult and less forgiving, and as time marches on, the ownership and love must change hands. Hopefully, the next owner will be similarly captivated by the sheer beauty and utility of this unique craft.